Home / Roof Damage Repair / Commercial Roof Flashing Failure Repair
Share roof plans, interior symptoms, photos, prior repairs, and access rules. We will inspect the flashing and its backing, trace the water route, and define a close-in method for the verified failure.
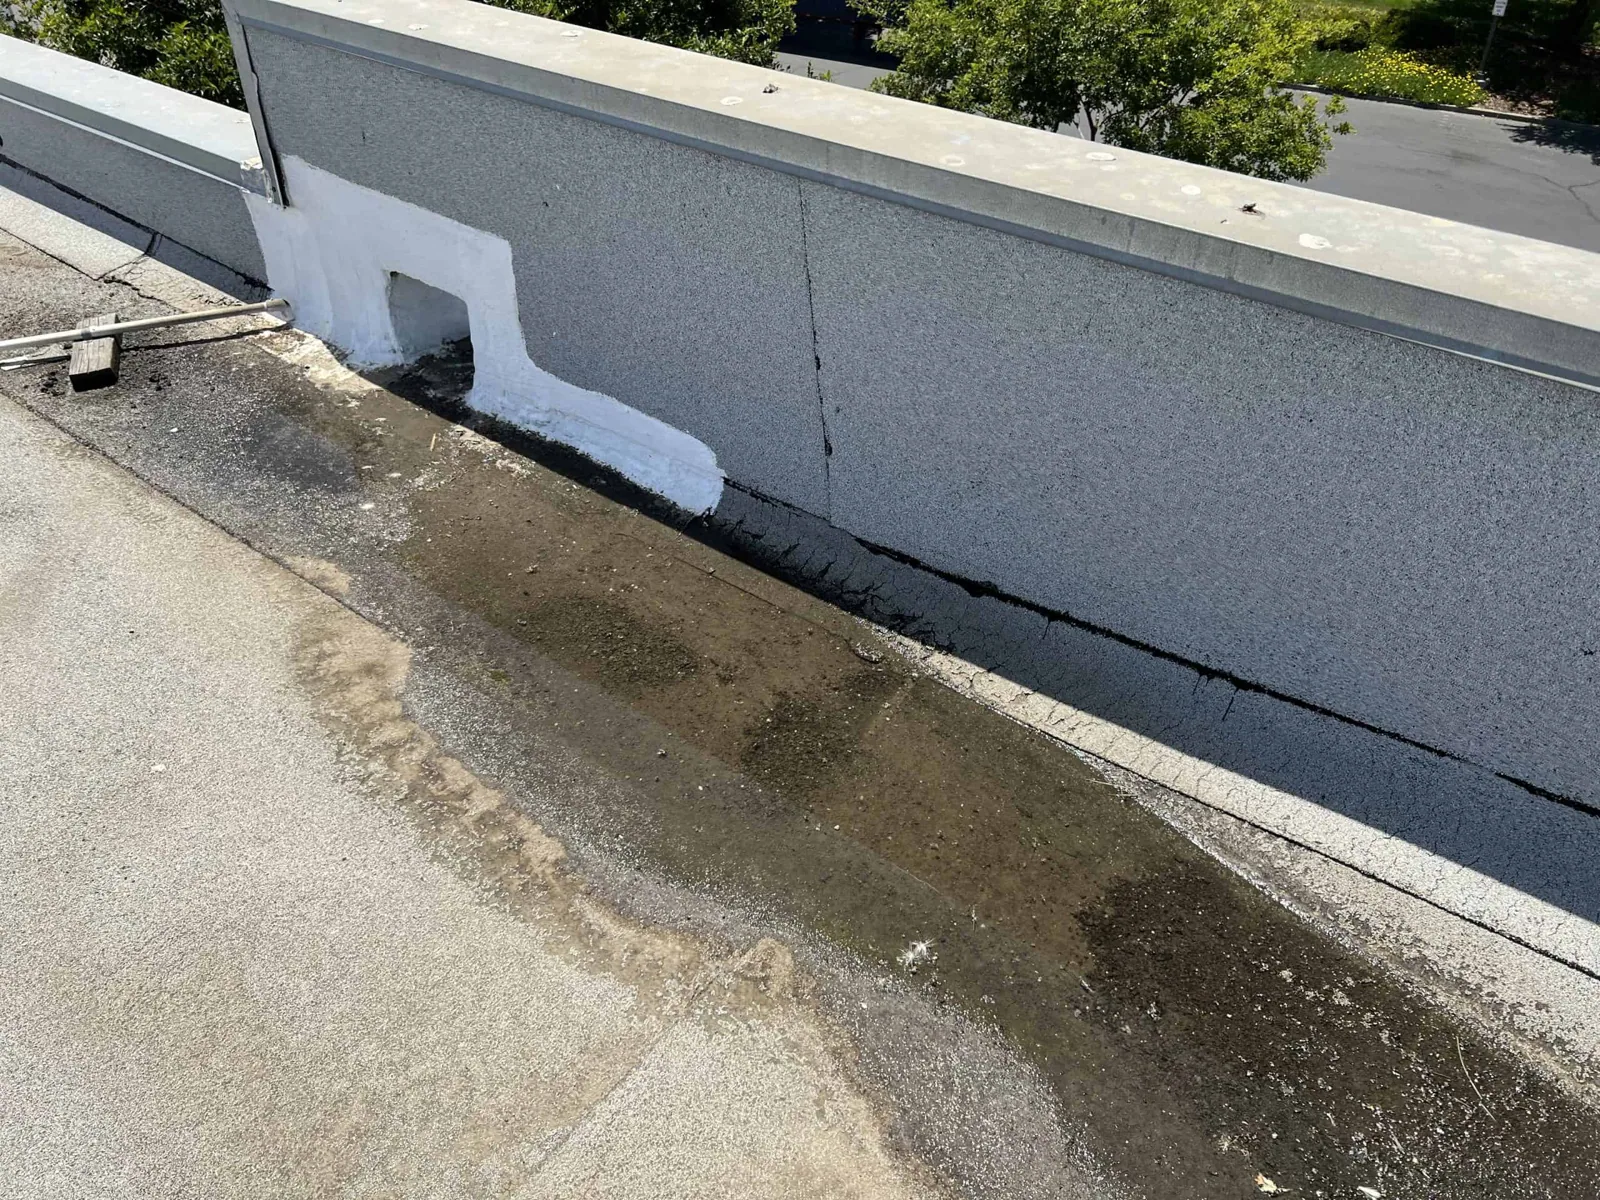
We inspect coping joints, counterflashing, curb corners, wall terminations, pitch pockets, and metal laps. Look for a separated seam, cracked sealant, loose fastener, pulled cleat, split membrane, or metal that no longer covers the intended transition. A neat bead of sealant can conceal movement beneath it. We check the attachment and adjacent substrate instead of applying another surface layer without a reason.
We also check whether the metal is lapped in the direction of drainage and whether a joint ends at a low point. Water marks on the wall or rust at a fastener can help narrow the route, but neither proves the entry point by itself. The roof, wall, and interior observations belong in the same dated condition record for later comparison when needed.
Photographs should show the whole wall or curb first, then the exact opening. Record roof zone, detail height, nearby penetrations, and whether water is active inside. If flashing is hidden behind siding or equipment, mark the inspection limit. A roof inspection can map connected details and distinguish a single failed corner from a line of repeated openings.
Water may enter at a wall termination, follow the deck, then appear several feet from the flashing. We compare reported room locations with roof slope, seams, drains, and penetrations. At a parapet, inspect coping joints and the membrane turn-up together. At an equipment curb, check the corner, curb height, and support. A nearby seam can also be involved if water ponds against the transition.
At a wall, we check whether the membrane turns up behind counterflashing and whether the termination is mechanically secured. At a curb, the top edge, corners, and lower membrane tie-in each need a continuous water-shedding detail. A hole in sealant may be visible, but the repair must also check the metal lap or attachment that holds the assembly in place.
Nearby Detroit climate normals show a seasonal temperature range and winter snowfall. Freeze-thaw can affect water at an open joint, but those regional records are not a property-specific event report. We note the actual roof surface, wet areas, and safe access on the visit date. If water is active, leak tracing follows the evidence; temporary protection may be needed before a permanent flashing scope can be set.
Flashing can open when fasteners loosen, a substrate deteriorates, a curb shifts, or adjacent materials move at different rates. Metal and membrane respond differently to thermal movement. We inspect cleats, termination bars, blocking, curb condition, wall interface, and the material below the visible split. A replacement piece attached to a weak substrate can repeat the failure.
Wind can also lift a termination or coping section. Check for uplift marks, bent metal, displaced fasteners, and matching movement at adjacent corners. If the broader perimeter has released, a wind-related roof review may need to include edge restraint and adjacent seams. Where the flashing is sound but a membrane lap has separated, assess a seam failure separately and keep the repair boundary specific.
We remove failed flashing and sealant to a stable boundary, inspect the backing, and rebuild the transition with materials compatible with the roof system. The repair may require new metal, a membrane patch, a formed corner, new termination, or substrate repair. The detail should shed water, maintain required height, and remain attached through expected movement.
Metal thickness, profile, and finish should fit the existing transition and the required attachment. A field-formed piece must not block drainage or cover a termination that needs inspection. We verify dimensions and adjoining materials before fabrication. If the wall finish prevents access to a required counterflashing leg, that limit is noted and the scope is coordinated with the wall trade before the joint is closed.
At a curb, we check corner geometry and the roof membrane around all sides, not just the side above the stain. At a parapet, we inspect coping attachment and joints with the membrane termination below. If wet insulation or deteriorated deck is exposed, document the condition and review the expanded scope before close-in. A commercial roof repair records removed material, replacement layers, fastening, and final tie-in.
After installation, inspect corners, laps, fasteners, sealant terminations, and the transition to adjacent membrane or wall materials. Where the method permits, check the completed detail without directing water into the assembly. We photograph the finished work and label its roof location. Any adjacent area hidden by equipment, snow, or a wall finish is listed as not inspected.
Seasonal temperatures can expand and contract metal relative to the roof membrane. A rigid bead over a moving joint can split again if the backing or joint design is not corrected. We record the detail type, fastener spacing where accessible, and material transition so a later inspection can compare like conditions.
At manufacturing sites in the Mound corridor, access may need coordination with active operations. Commercial properties on the Golden Corridor may require customer-route protection or a restricted lift window. These local conditions affect staging, not diagnosis. Share roof plans, photos from indoors and above, equipment history, prior repair notes, and access requirements. We will trace the opening, identify its backing, and return a repair scope that addresses how the transition failed.
Sometimes, but the metal, substrate, attachment, and movement must support that method. We inspect the backing before choosing a surface repair.
Water can travel beneath the membrane or along the deck before it reaches an interior finish. We compare the room report with roof slope and transitions.
The affected length and attachment condition set the boundary. We check neighboring joints and fasteners before extending the repair.
Often, if access and work controls allow. We coordinate with the site contact and identify any equipment restriction before opening the detail.
Send roof plans, interior leak locations, photos of the wall or curb, prior repair history, and the access route to the detail.
Share roof plans, interior symptoms, photos, prior repairs, and access rules. We will inspect the flashing and its backing, trace the water route, and define a close-in method for the verified failure.